This month, I am handing over the reins to writer Kerstin Czarra to tell the story in her own words with a few interjections from me throughout.—Megan Pflug
During a conversation we had, Megan casually said, “It would be fun to do an easy but stylish before-and-after.” Before I realized it, I said, “You can try my kitchen if you really want a challenge.” Half-joking really. But Megan was already grabbing her measuring tape and camera and inquiring when she could drop by to “assess” the situation.
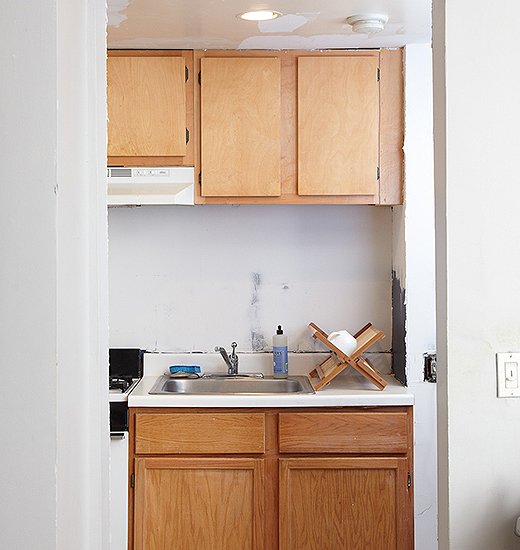
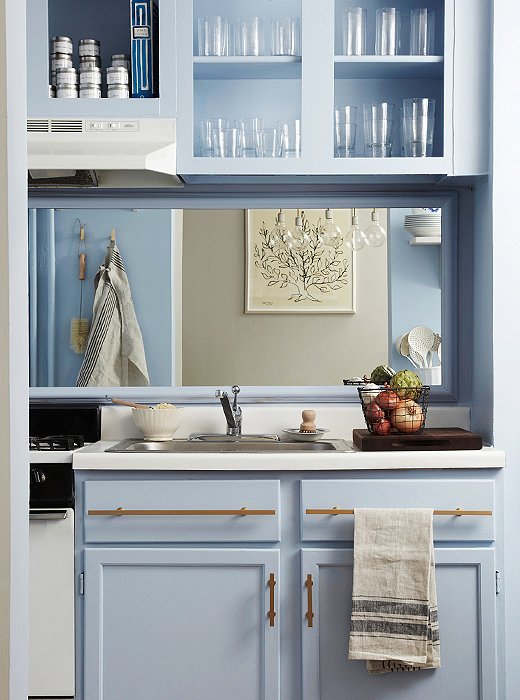
The situation, like many a New York City kitchen, was quite grim. The space was tiny (three feet by six feet) and dark (no windows), with about two square feet of counter space (seriously) and the usual rental materials (dingy linoleum, cheap cabinetry, and neglected walls that had been painted over at least 10 times). It was topped (literally) with an 1980s recessed light that made the space even more unappetizing.
The first step in the process? “Find me a picture of a kitchen you love,” said Megan. That was easy; I had come across an image of a kitchen dreamed up by a Danish design firm that I loved because it struck the perfect balance between classic and decidedly cool.
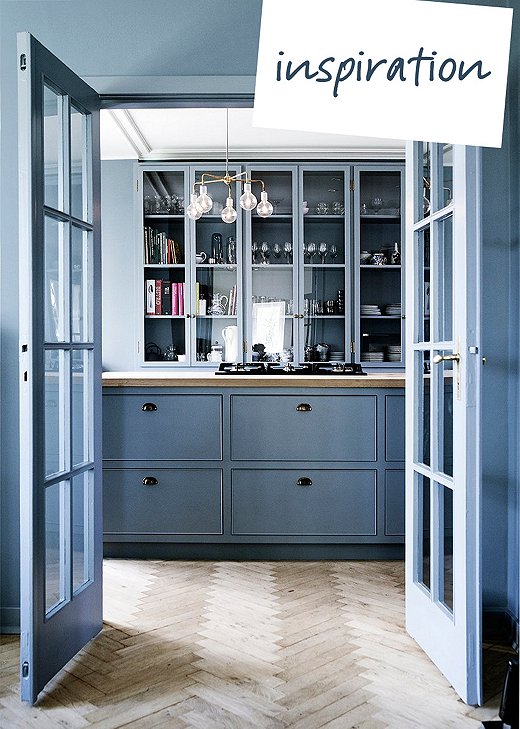
Design by Københavns Møbelsnedkeri, photo by Line Klein
Then Megan had me break down the elements that spoke to me:
The color. I like how painting everything that grayish blue looked so sophisticated and bespoke.
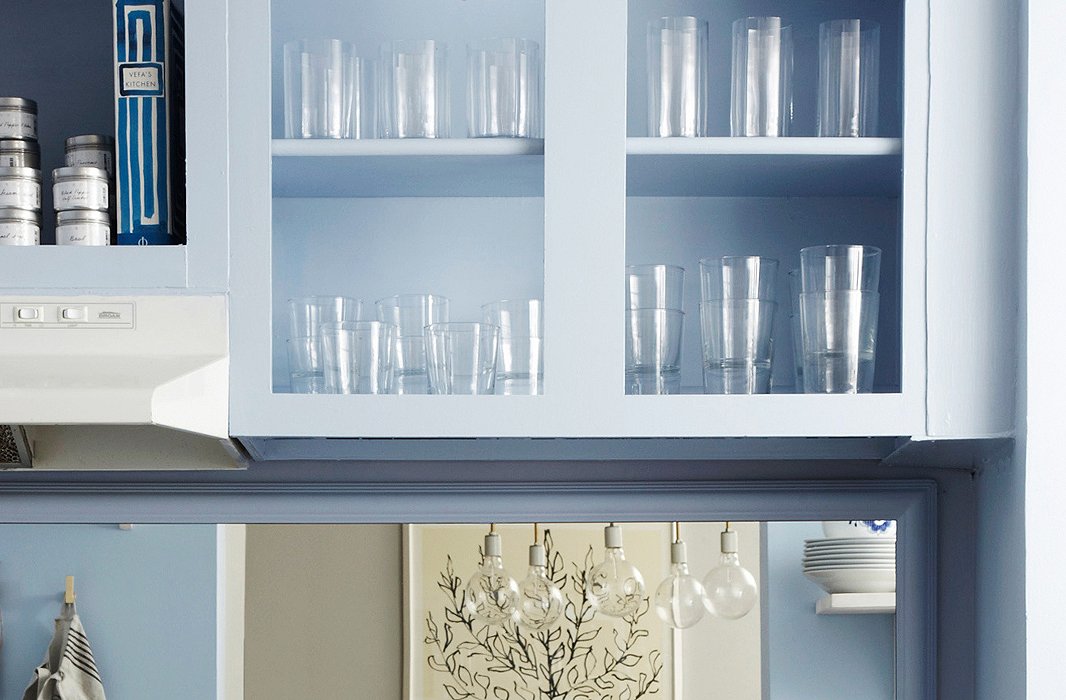
The glass-front cabinets. They remind me of something you’d see in an old library.
The floors. Herringbone is a subtle hit of pattern and different from the usual dark wood planks so popular right now.
The light fixture. It’s the surprise in the room, like some glam version of Tinker Toys.
Megan assured me we could get the look easily with a few clever reinterpretations of the list above. Even better, she said it would involve no demolition, permits, or having to stay elsewhere while my kitchen was in ruins. “You might look at a less-than-beautiful kitchen and think ripping out cabinets or tearing up floors is the only solution,” says Megan. “But I wanted to show how truly transforming a total wash of paint color can be. It has the power to unify disparate finishes and forgives any imperfections.”
Here’s the step-by-step evolution of my hovel of a kitchen into a dead ringer for the Danish beauty.
Step 1: Walls
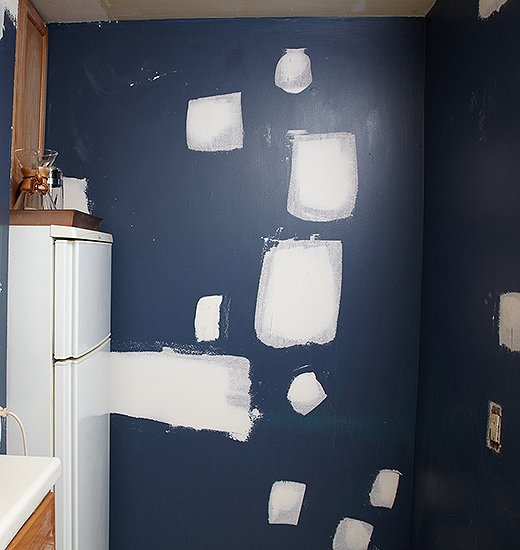
Before
I had painted the kitchen a navy blue in keeping with the decorating maxim that dark colors can actually make a room appear larger. Not true in this case. Megan suggested that before we even picked out a paint color, we had the walls skim-coated so that the surface would be smooth and nick-free.
After
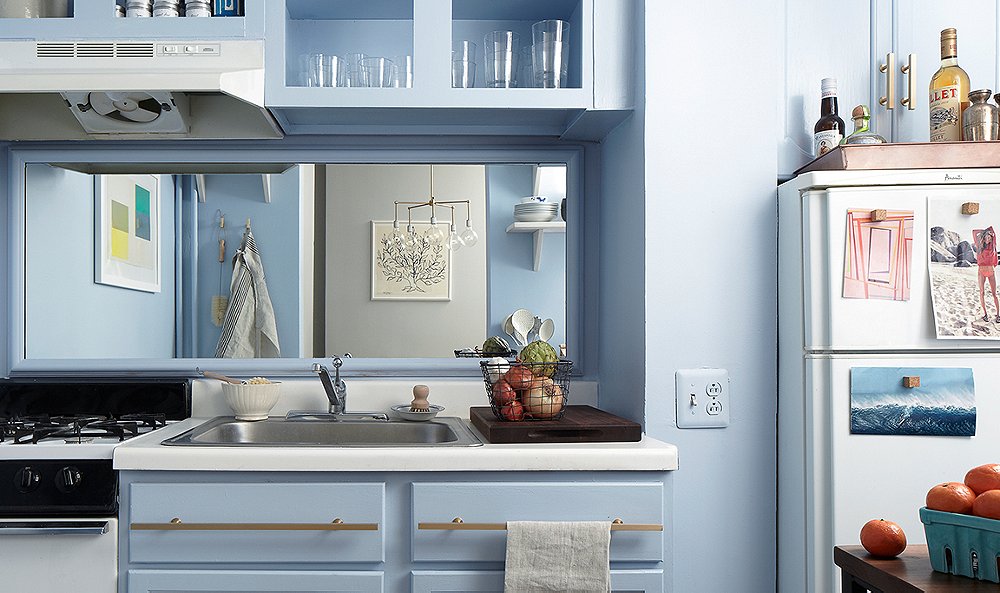
After the skim coat and a layer of Benjamin Moore Blue Ice 821, the walls were gallery-worthy. They even inspired me to move a favorite print from the living room to the kitchen.
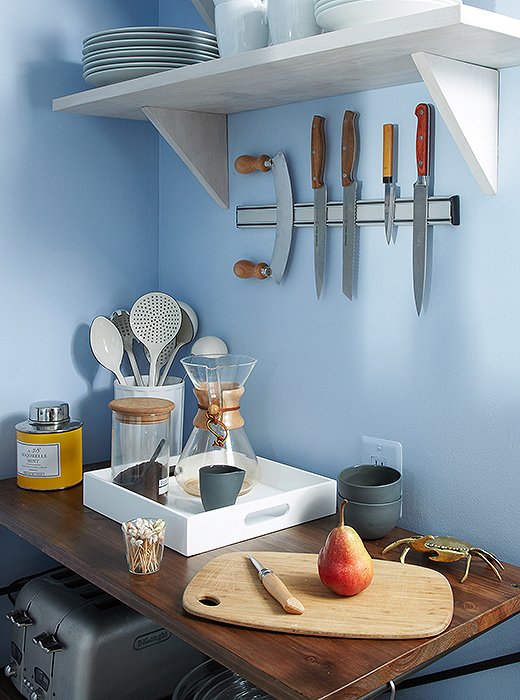
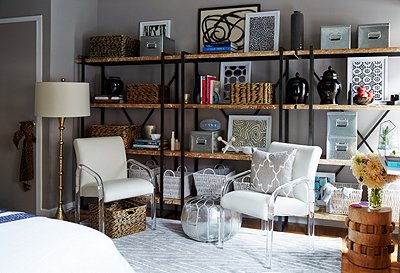
Bonus Solution: Slim Storage
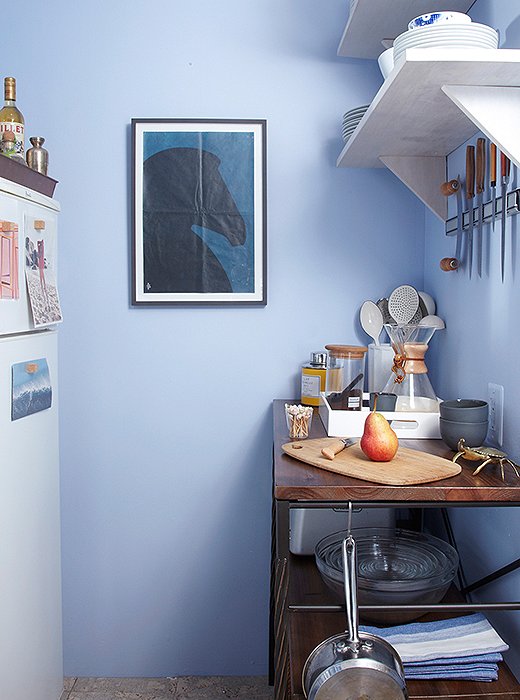
To make up for the lack of counter and storage space. Megan brought in a skinny console table with shelving and added a few whitewashed shelves above it. Now everything is in easy reach, and I have a space to chop, stir, and make my morning café au lait (all of which used to happen on my dining room table).
Step 2: The Cabinets
Before
Not only were my cabinets a dull-yellow wood, but they were mismatched as well. To mimic the glass-front cabinets I loved so much, Megan suggested a simple change: Remove the doors on the upper cabinets and fill them with new, simple glassware.
After
With the cabinets’ interiors painted and the glassware in place, I sometimes forget that I don’t actually have the custom glass cabinetry.
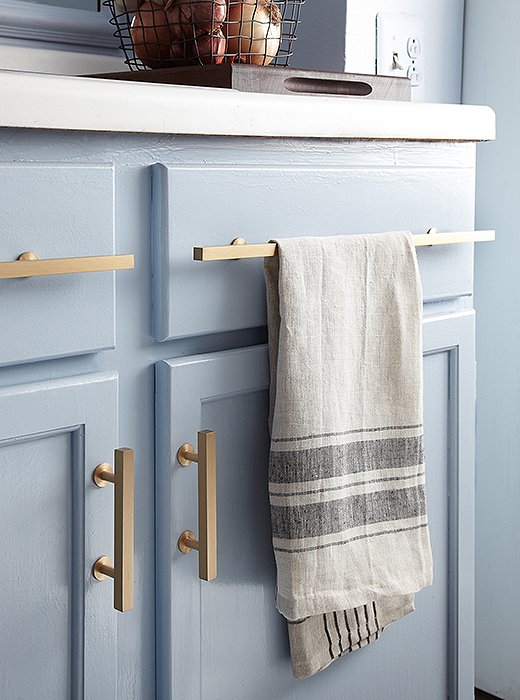
Bonus Solution: Working Hardware
Megan added sleek, brushed-brass cabinet pulls to give the remaining cabinet fronts an upgrade. For the two nonworking drawers that front the sink, she fitted two extra-long pulls, and now I have a great place to hang dish towels.
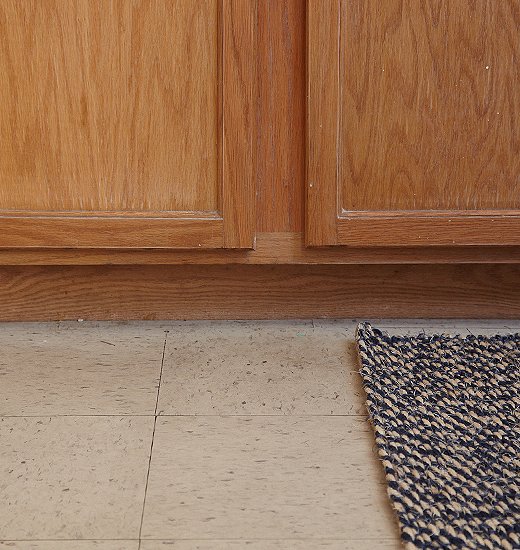
Step 3: The Floors
Before
While the rest of my apartment has lovely parquet wood flooring, the kitchen was not so lucky. A linoleum tile was what I referred to as “institutional chic.” While I dreamed of a whitewashed herringbone floor, Megan had an intriguing alternative: cork.
After
This incredible design remind me of Italian marbleized paper. And cork is so soft and giving when I’m standing washing dishes. Megan installed it herself and says the process is supereasy. “In addition to being both durable and beautiful, this cork flooring is easily cut with a utility knife and then glued down with contact cement,” she says. “It’s literally a cut-and-paste install!”
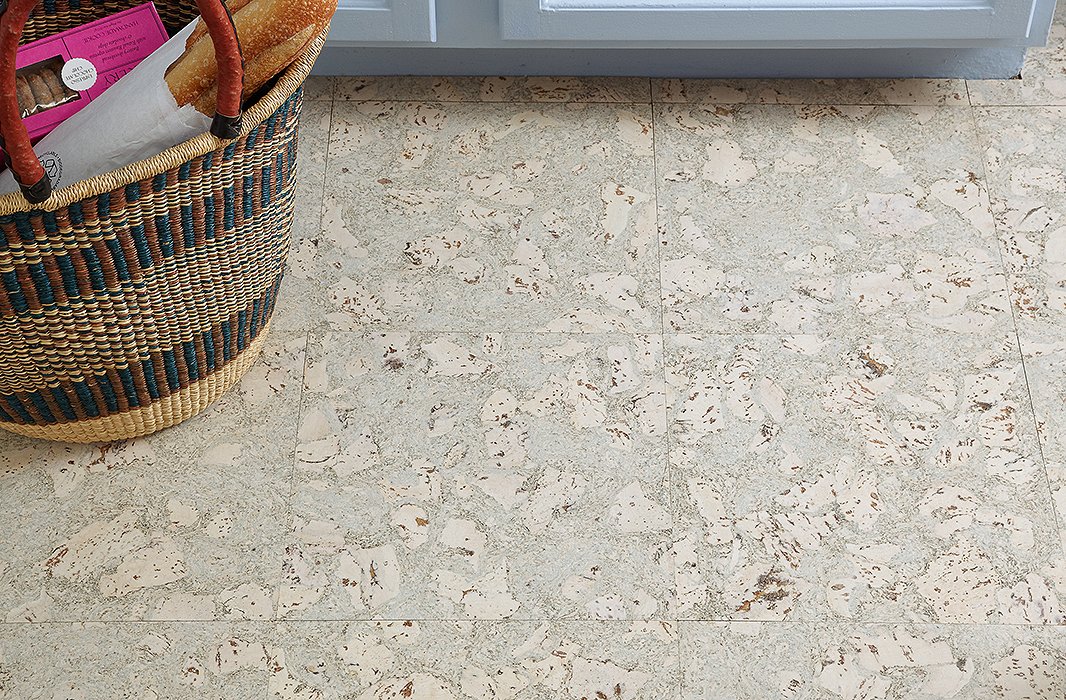
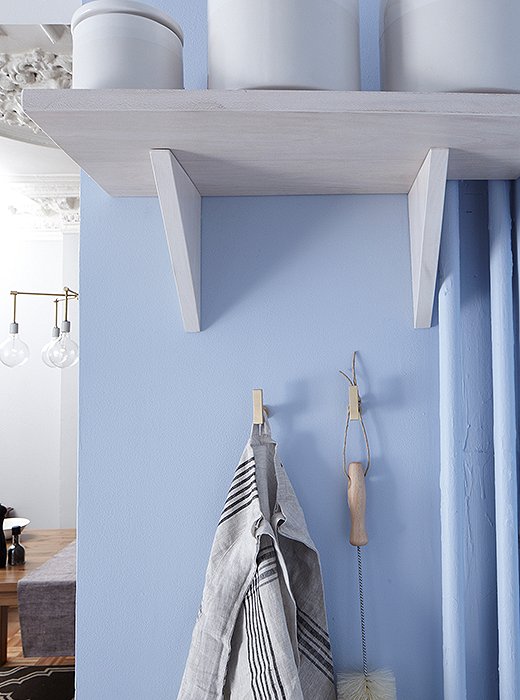
Bonus Solution: Use Every Inch
Even this sliver of a wall was reimagined as storage. Megan added a few drawer pulls to serve as hooks and another, smaller whitewashed shelf.
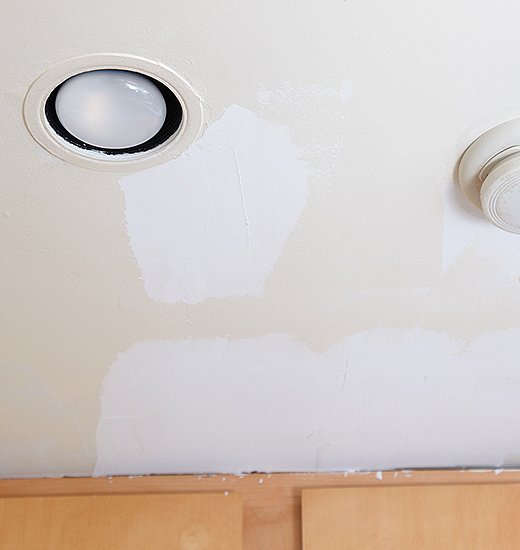
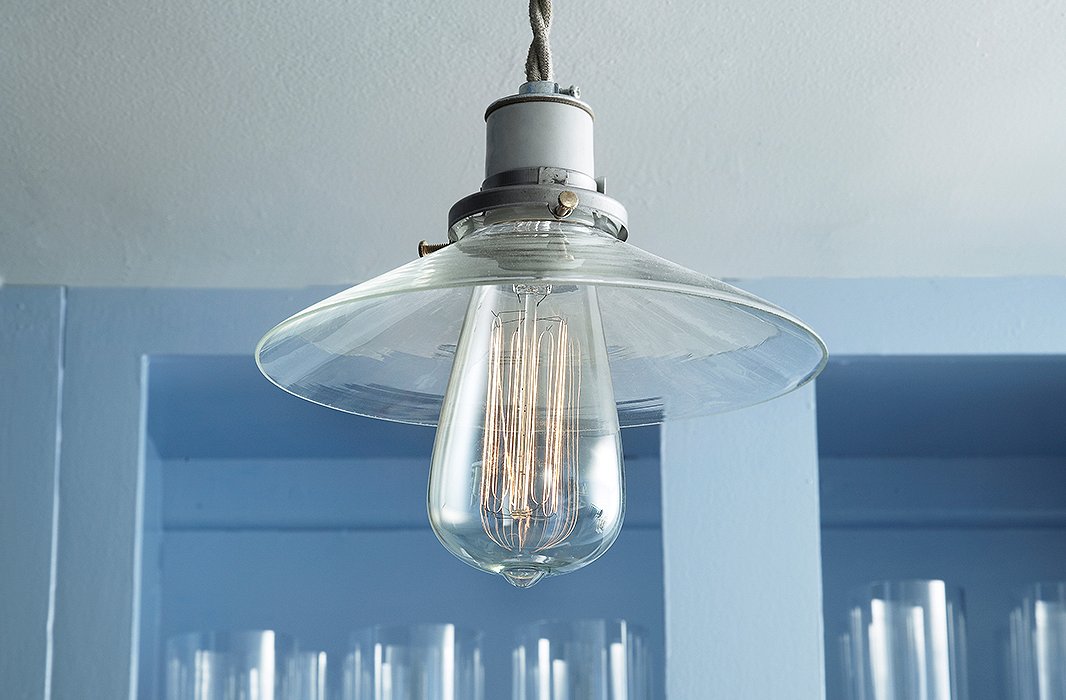
Step 4: The Light
Before
The recessed canister was casting a harsh light on the depressing space. While my dream chandelier was deemed too big for the room, it did happily find a home nearby (see the bonus solution below). Instead, Megan used a simple pendant that fit the scale of the space.
After
The new light with an Edison bulb gives the whole kitchen a soft glow, and the glass shade blends into the glasses in the cabinet, opening up the room even more.
Bonus Solution: Follow the Light
Knowing how much I adored the light that was so key to my original vision, Megan designed and built her very own version and suggested we hang it in the dining room. I love how it carries the brass-and-glass look into the adjoining room. Check out the full how-to for this DIY chandelier here.
Bonus Solution: Reflective Backsplash
While a backsplash was not at the top of my “want” list, there was a huge space behind the sink and the stove that begged for something. Megan came up with the genius idea of a large mirror. “The mirrored backsplash bounces natural light from the dining room and creates the illusion of a bigger and brighter space,” she says. “I painted the frame the same color as the wall to give it a built-in look.” Plus, I get to gaze at my chandelier when I am doing something as dull as peeling carrots.
We’d love to see what you’re making! Share your weekend projects on Instagram using #WeekendDecorator, and be sure to follow @onekingslane to never miss a project.

I love the the wall color!! How about using it in a bedroom?
Where did you get the pulls from?
I’m also interested in the kitchen cabinet handles. Where can they be purchased?
Handles are from My Knobs.
http://www.myknobs.com/lew31102.html
Where did you get the pendant light fixture?
Are the cabinets painted blue ice also? What was involved in prepping the wood?
Hi Valerie, The cabinets are the same paint/color but in an oil based formula. The only pre involved was a light sanding to the wood and then a good primer.
So, if you removed all the things in your cabinets so you could fill them with new simple glassware, where do you keep all the items that were previously in the upper cabs? I imagine this would include things like dishes.pots/pans, or perhaps pantry items??
Can she come to my kitchen? Your before picture is 1 million times better than my kitchen.
Clever, unified and thorough…love it
Yes! I love, love, love oil paint on cabinets! I have painted mine twice and they’re holding up so beautifully. This Blue Ice paint color is just lovely!
I rarely comment on these things, but it is SO refreshing to see a makeover that does not involve taking everything in the kitchen and throwing it away. It looks lovely, and I’m sure it feels new and refreshing to the owner, which is what we are all looking for in a remodel anyway.
This was fantastic. It’s nice to see something that seems so approachable and demo/construction free. Looks great!
That is really inspiring. I want a blue kitchen so much. We are moving and the previous owner put in venetian gold granite which has thrown me for a loop. I can’t bear to rip it out and throw it away but I want white marble or white granite to go with my cabinets which I am having painted blue. If you can work with what you have got and come so close to your dream kitchen I can put up with gold granite.
Oh I wanted to ask how much the renovation actually cost in the end?