Megan Pflug, style guru behind our “Weekend Decorator” column, is an editor and interior designer based in New York. She’s back with her latest crazy-cool DIY project—a head-to-toe bedroom makeover decked out with beautiful fabrics from The Shade Store. Though this time, she’s handing over the reins to One Kings Lane editor Dickson Wong to tell the story in his own words with a few interjections throughout.
On one of Megan’s recent visits to the office, I mentioned that I had just moved into my first solo apartment, a considerable feat and graduation of sorts as I met my 10-year mark of living in the city. “That’s a true rite of passage in New York,” she said, immediately asking to see pictures of the space. I was a bit reluctant at first, as I had just settled into my new home. “It’s not quite there yet,” I said, speaking specifically about my bedroom. “Just let me take a look,” she insisted.
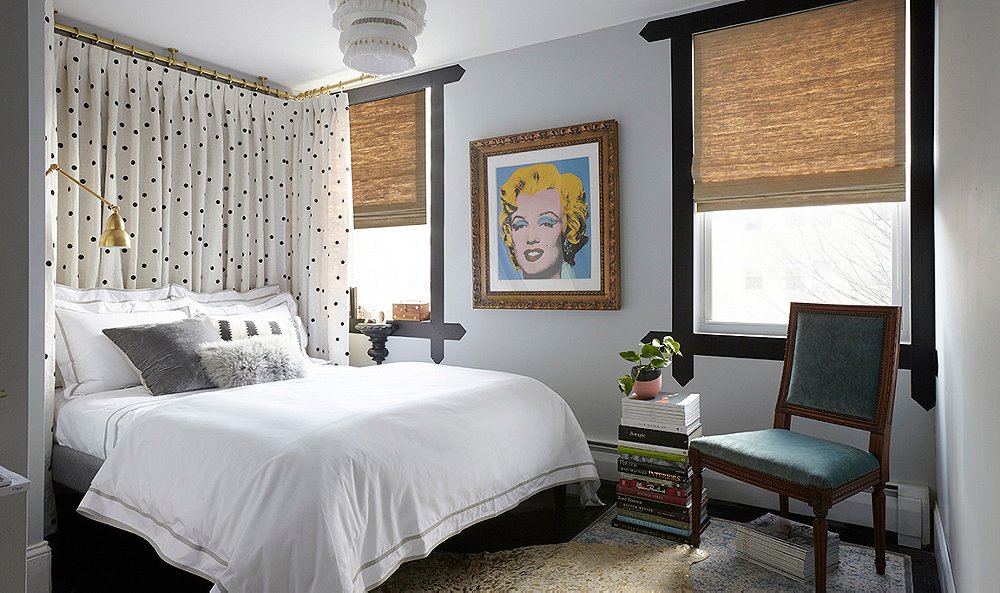
The next thing I know, Megan is at my apartment scoping out my bedroom. One look and it was clear to her that I had been struggling with what to do beyond having a bed. The tiny space had a “challenging Lego-shape layout” and was “lacking in detail.” There was little room for a headboard (something I’ve been longing for) and nightstands (another need); the glossy black-painted floors had seen some serious scuffing; and the room felt perpetually dim despite two sizable windows. What’s more, the walls were bare save for a minuscule gilded mirror, and a wobbly overhead pendant, better-suited in kitchens, gave off a steely coldness.
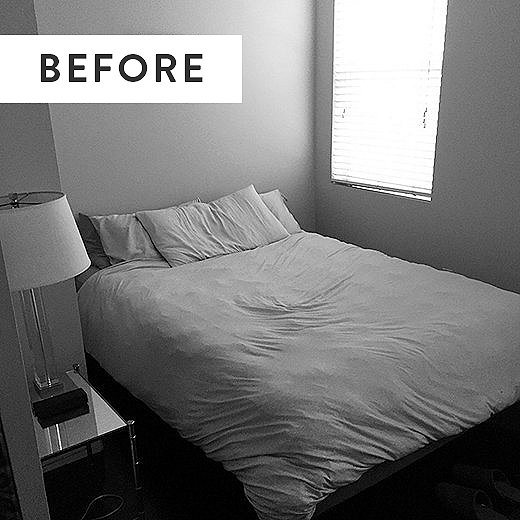
Like a lot of other city dwellers, I saw my bedroom as merely serving a purpose rather than as a space that invited retreat and repose. It was functionally fine but left much to be desired in terms of style, color, and light. I didn’t realize it then, but my bedroom had managed to feel both bare and cramped, and the soft gray walls, black floors, and clunky window blinds that streamed little light did not help alleviate the overall grim look and feel.
“Let’s make a canopy for your bed,” prompted Megan after seeing my room. I loved the idea and, without skipping a beat, took her up on her offer. That became her inspiration and kick-started a complete overhaul of my bedroom. My only caveat? Everything she did had to be relatively renter-friendly. She assured me this was all easily achievable with just “a few key additions” and some superstylish DIY solutions.
Read on to see how she fully transforms my uninspired, boring bedroom into a seriously polished hideaway.
Bedroom Solve #1: The Canopy Bed
The challenge: A headboard would’ve been a bulky addition that pushed the bed out farther in an already small space.
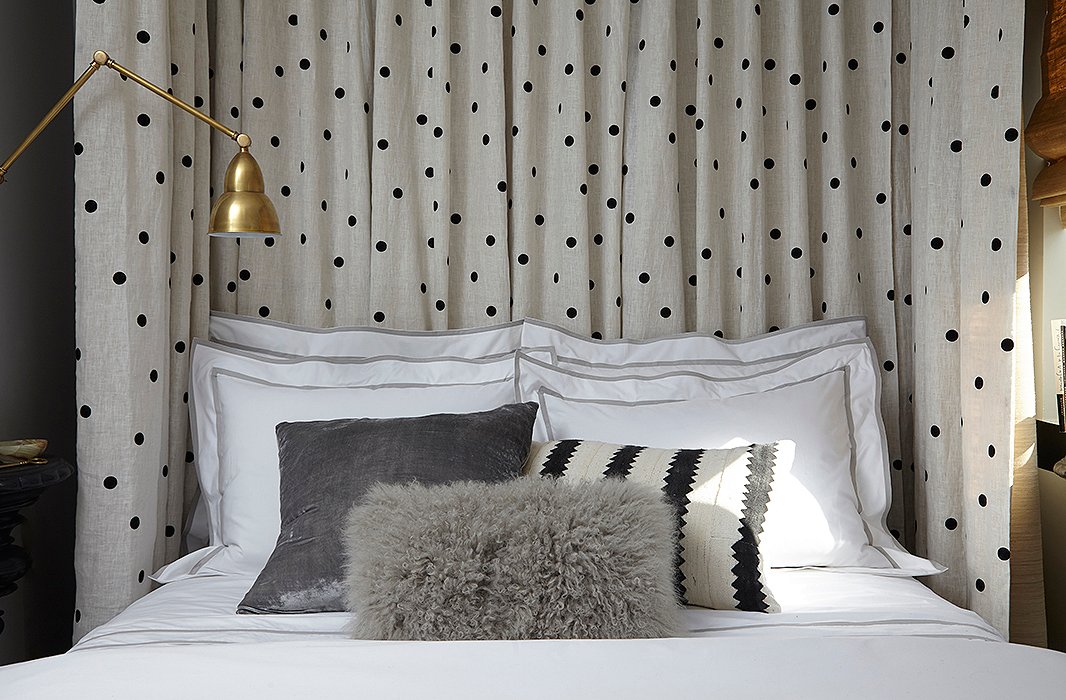
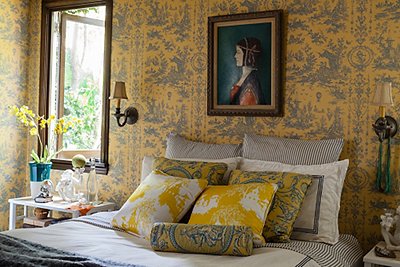
The solution: A chic alternative to a hefty headboard, floor-to-ceiling curtains took up virtually no space. Megan’s created quite a few DIY canopy beds over the years, and for my bed she decided to go with a simpler fabric treatment: three drapes hung floor-to-ceiling (one behind the bed, two alongside) rather than dressing up the bed with curtains all around. This gave the room “a more airy appearance and wouldn’t obstruct any sight lines,” says Megan. “It also helped make the ceiling appear higher than it is in.”
And while I was wary of drilling holes into the ceiling for the hardware, Megan assured me that “it will be really easy to remove, and you’ll only need to patch a couple of small holes when you leave the apartment.”
Tip from Megan: “This style of canopy can help anchor a bed in a space, and because the canopy is scaled to fit the bed, it can easily travel with you to your next home.”
Bonus Solution: A Poppy Backdrop
During our discussions around drapery, Megan discovered I have a soft spot for polka dots—a pattern that drums up the bold creations of Yayoi Kusama and Roy Lichtenstein in my mind. We decided to splurge on custom drapes and hardware for the canopy from The Shade Store: a natural-color raw silk for the outside and a silk-linen polka-dot lining for the inside. The perfect mix of polish and Pop Art flair, it worked wonderfully with a Warhol print I already had from One Kings Lane. But Megan points out that you can easily recreate this look using any pattern or premade drape of your liking.
Steal the Look
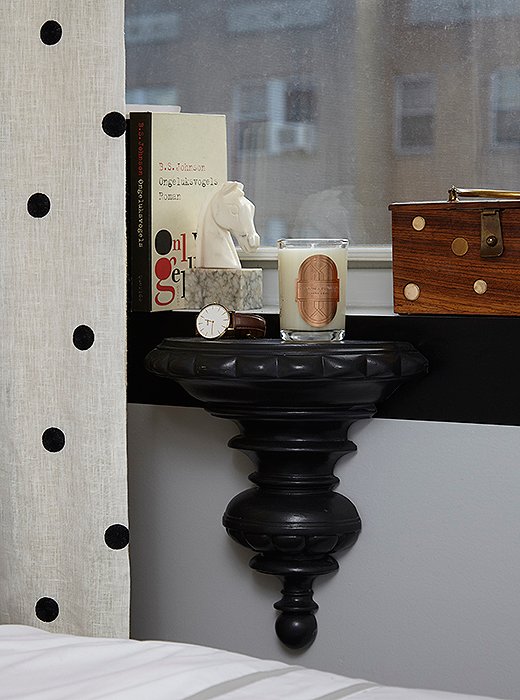
Bedroom Solve #2: The Bedside Table(s)
The challenge: With only about 12 inches on either side of the bed, nightstands were out of the question. But a surface (any surface) for books and a glass of water within easy reach topped my list of bedroom musts for Megan.
The solution: Rather than trying to squeeze in a table, Megan opted for a pair of vintage corbels, mounting one on each side of the bed. They became stylish and unexpected floating nightstands with enough surface space for holding small item, such as a candle, mini catchalls, and a stack of books or simply my eyeglasses and a water carafe.
On one side Megan also added a wall-mounted plug-in sconce to act as a reading light.

Bedroom Solve #3: The Windows
The challenge: There was one main design dilemma here: We needed to amplify the natural light coming in through the windows—an “easy fix,” according to Megan.
The solution: “Slatted blinds can be the biggest nightmare in a bedroom,” says Megan. It’s true. I rarely drew mine up because the cluster of strings would often get tangled, causing the blinds to rise unevenly or get stuck; turning the slats didn’t seem to do much to brighten the room either. The answer to my dark woes? Megan commissioned a pair of custom roman blinds from The Shade Store in the same solid silk fabric she used for the outside of the canopy drapes—replacements that helped free up my windows from its slatted cage. The moment Megan hung up the romans, light flooded into the room, and I sensed an immediate shift in the ambience.
Bonus Solution: A Bold Renter-Friendly Molding
My apartment wasn’t blessed with beautiful interior architecture, so Megan wanted to find a way to beef up the impact of my windows. Between the polka-dot pattern of the drapes and the large Warhol reproduction, she decided to go all-in with the graphic Pop Art vibe by creating a simple window DIY. She cut stripes of removable wallpaper to create a bold outline around the windows. Click here for the full step-by-step tutorial for this window-frame DIY. →
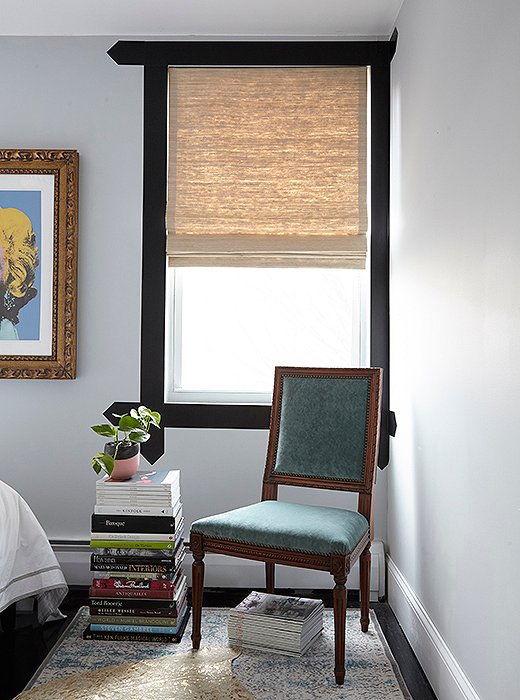
Bedroom Solve #4: The Seating Area
The challenge: A tufted settee originally faced the bed, occupying much of the remaining space in the already-small bedroom. One of the first things Megan pointed out to me on her visit was “rather than a big upholstered seat here, lean small but better.”
The solution: Because real estate was tight we had to be strategic with the settee substitute. Our pick? An elegant Louis-style green velvet chair, perfect in size with a pretty shape that “can hold its own,” noted Megan. “Just because a space is small does not mean that you need to buy the typical space-saving furniture or low-quality pieces.” She urged me, with my move into a new home, to start investing in pieces that could travel with me over time—an opinion that, as a renter, I wholeheartedly agree with. The chair also doubled as a windowside chair for reading as well as a convenient catchall for coats; in addition, I can easily move it into the living area for extra seating if needed. Megan then stacked some of my heavy art books and magazines alongside for an ingenious side stand that I can easily rearrange and shift.
Bonus Solution: Cover Up with Layered Rugs
Given the odd layout of the room, an oversize rug would have simply disappeared under the bed, according to Megan. It also wouldn’t cover up the scuff marks across parts of my floor. To solve both dilemmas, Megan chose two smaller rugs: a traditional Turkish and a gold-flecked hide. By layering the hide over the Turkish, she offset the awkward layout of the room, covered up the blemishes, and even brought in some great texture and shine.
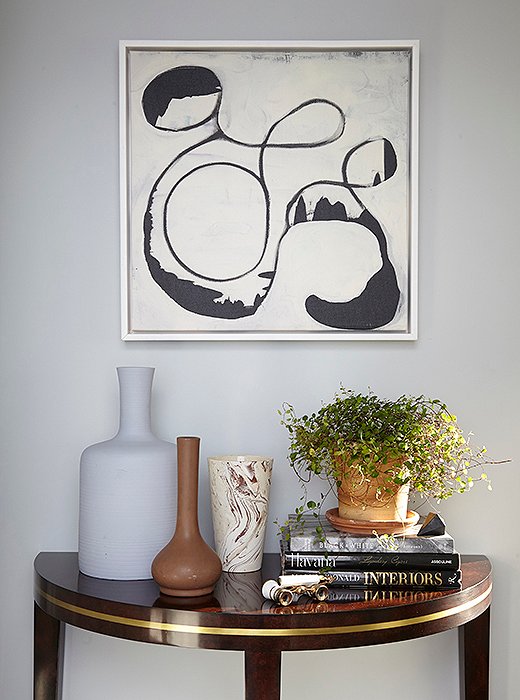
Bedroom Solve #5: The Finishing Touches
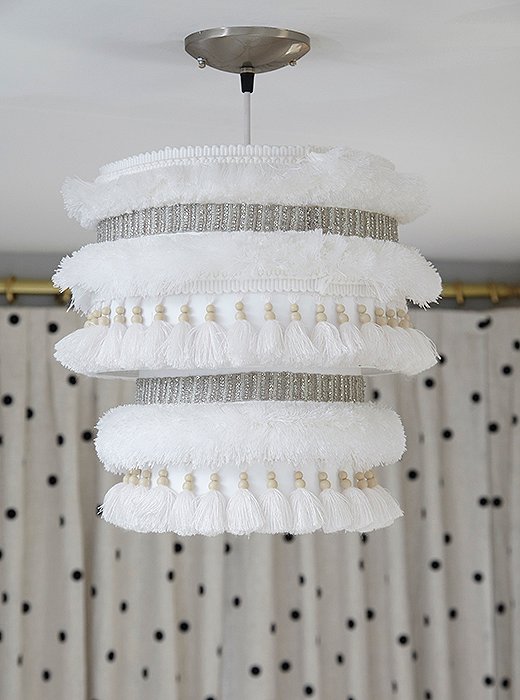
The challenge: Megan called out early that my bedroom needed that touch of warmth you get only from personal objects. The less-than-ideal light fixture didn’t help matters.
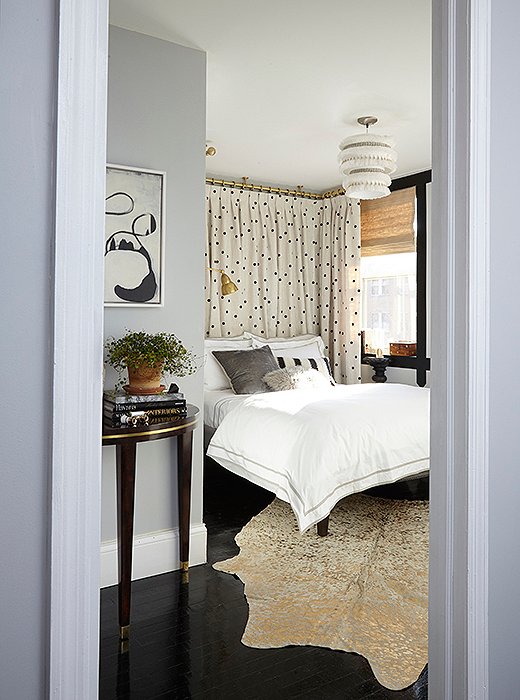
The solution: Megan zeroed in on the area when you first enter my bedroom, which was “crying out for something” but was tight. She put in an elegant demilune that made for the perfect solution, its rounded corners helping to save space. Like the chair, this piece has a lot of integrity and can easily transition wherever I live. For the light fixture, Megan swapped in a DIY pendant, inspired by a Moroccan wedding blanket, that she had created a while back. Check out the full pendant DIY here.

so lovely!
I love the canopy idea! I would love to know where the brass curtain rods are from that can hang from the ceiling! Thank you!